
BED LEVEL
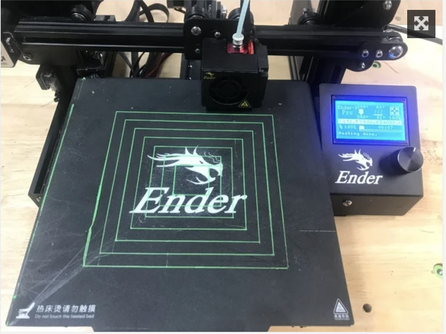
Ender 3
|
|
|
InstructionsThere are two files required.
1) First run the CHEP_M0_bed_level.gcode file on your Ender 3 or any similar size printer with an 8-Bit board. Adjust each corner by running a piece of paper or Filament Friday sticker under the nozzle until you can barely move it then click the LCD knob to advance to the next corner. 2) Then run the CHEP_bed_level_print.gcode file and live adjust or "adjust on the fly" the bed level knobs to get as close to a level bed as possible. The print will continue multiple layers but you can stop the print at any time and then you are ready to 3D print without worrying about bed level. I also include the CHEP_bed_level_print.stl if you want to slice it yourself. 32-Bit Ender 3 V2 and newer Ender 3, Ender 3 Pro For newer printers, Creality is now installing 32-Bit boards in the machine and running Marlin 2.0,x firmware. Some of these setups don't recognize the M10 command so I've created a CHEP_M25_bed_level.gcode version for these. It works the same but instead of just clicking the LCD knob you have to go into the print menu and select Resume Print to advance to the next corner. |
FilesDownload and unzip. There are three files included.
Version 4.0 - Movement between corners is now faster. There is also two versions: An M0 Pause version for 8-Bit Ender 3 and an M25 Pause version for 32-Bit Ender 3.
Note: M25 will also work on 8-Bit but you must select resume print to get it to the next corner. Ender 2 Pro Bed Level Files
Ender 2 Pro
Bed Level Adjustment File (Moves to each corner)
1) Copy both to your Ender 2 Pro SD Card. 2) Run ender_2_size_m0.gcode and level at each corner. 3) Run ender2_squares_test.gcode and live adjust per the video above. There are two files to download and load on the SD card.
Download the Files below and upzip the file to use them.
| ||
Ender 3 Max - Manual Bed Level
|
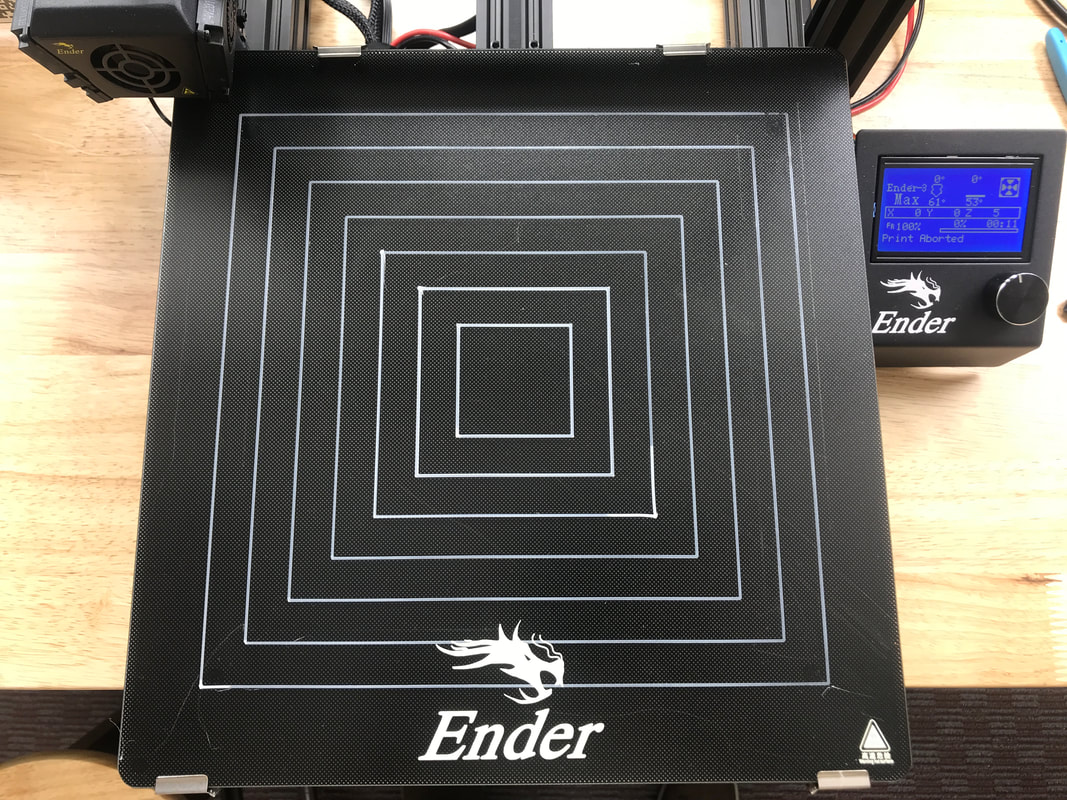
The Ender 3 Max has a larger bed than Ender 3 so these files adjust for those size differences.
Download the Ender3_Max_Bed_Level.zip and and unzip to find these two files: chep_lvl_knobs_max.gcode and chep_lvl_prnt_max.gcode Copy them to your SD card. Then: 1) Run the chep_lvl_knobs_max.gcode file. It will stop above each adjustment knob when you press the LCD display wheel. Level the bed using a piece of paper until the paper moves but you feel a slight resistance. Press the LCD display wheel to advance to the next position. 2) When the leveling at the knobs is done, run the chep_lvl_prnt_max.gcode file. It will heat up the bed and nozzle and print the square pattern seen to the right. As the print is laying done the first layer, rub your fingers on the print to make sure it's sticking but bit too flat that the nozzle is blocked from flowing. Stop the print at anytime and start it again if it seems off. 3) When you get a perfect (or close to perfect) set of squares, your bed is level and ready to print. |
Download File
| ||
CR-10
InstructionsThere are two files required. First run the CHEP_CR10_level_corners.gcode file on your CR-10 or any similar size printer. Adjust each corner by running a piece of paper under the nozzle until you can barely move it.
Then run the CHEP_bed_level_print.gcode file and live adjust or "adjust on the fly" the bed level knobs to get as close to a level bed as possible. The print will continue multiple layers but you can stop the print at any time and then you are ready to 3D print without worrying about bed level. I also include the CHEP_bed_level_print.stl if you want to slice it yourself. |

| ||